
So your running osTicket version 1.8.1.2 and you want to upgrade it to current which as of this writing is 1.9-rc1. Yopu’ve come to the right place. A couple notes before we get started. You may have read something on the forums about the pending release of 1.8.2 well due to the number of and the severity of changes in this new version it was decided that the 1.8.2 release number would be skipped and we would jump right to 1.9. This is not a minor release like originally planned, and I have to say that the beta group gave us some fantastic feedback. If you are interested in joining the osTicket AVid Users (Beta group) please go to https://groups.google.com/a/osticket.com/forum/#!forum/beta-testers
Now back to our regularly scheduled article.
Rember that 1.9-rc1 is not a stable release and should never be used on a production server in a production environment. You should really wait for 1.9ST to be released before you upgrade. The images in this article are for going from v 1.8.1.2 to 1.8.2 but this is the same thing as 1.9 as I stated previously the only real difference is the version number.
If you have ever upgraded osTicket in the past your experience this time will not be much different than it has been.
Before you start it is important to mention that if you have installed any mods or performed any custom coding (including changing graphics, translations, etc.) that upgrading will not be as simple as it sounds in this article and you will lose all the modifications that you made. You could very well break your site and at the very least lose some of the functionality that you now enjoy.
1. Put the site into offline mode.
To do this log into your site and navigate to Admin panel -> Settings -> Helpdesk Status and toggle the radial to “Offline (Disabled)”, scroll down and click “Save Changes”.
note: I personally leave the site open, but navigated back to the Client panel.
2. Make a back up of your database.
There are various ways to do this and I am not going to cover all of them, but my preferred way is to use command line. You can do this simply by issuing a command similar to:
mysqldump -u userName -p databaseName > fileName.sql
note: change userName to your DB username, databaseName to the name of your DB, and fileName to what ever you want to call the back up file.
Another easy way to do backups (on windows) is to use MySQL Admin (deprecated) or MySQL WorkBench.
3. Make a back up of your site.
Once again there are various ways to achieve this. I trust that you know how you want to do it, just make sure that you do it.
NOTE: You should never rely on your ISPs automatic backups,
always make your own backups before upgrading!!!
While you are here, you may want to also make a separate copy of your /include/ost-config.php file. This file contains the database connection information.
4. Download the latest version of OSTicket. Once 1.9ST is released you will be able to get it from GitHub, but for right now you can only get the Release Candidate from osTicket.com/download-edge.
5. Extract it to your OSTicket directory. Yes, you can and should have it over write existing files.
6. re load your web page. When the page loads you should be looking at the image below. Since this is an upgrade you should be looking at the upgrader. This is important to note since the Upgrader looks different from the Installer.
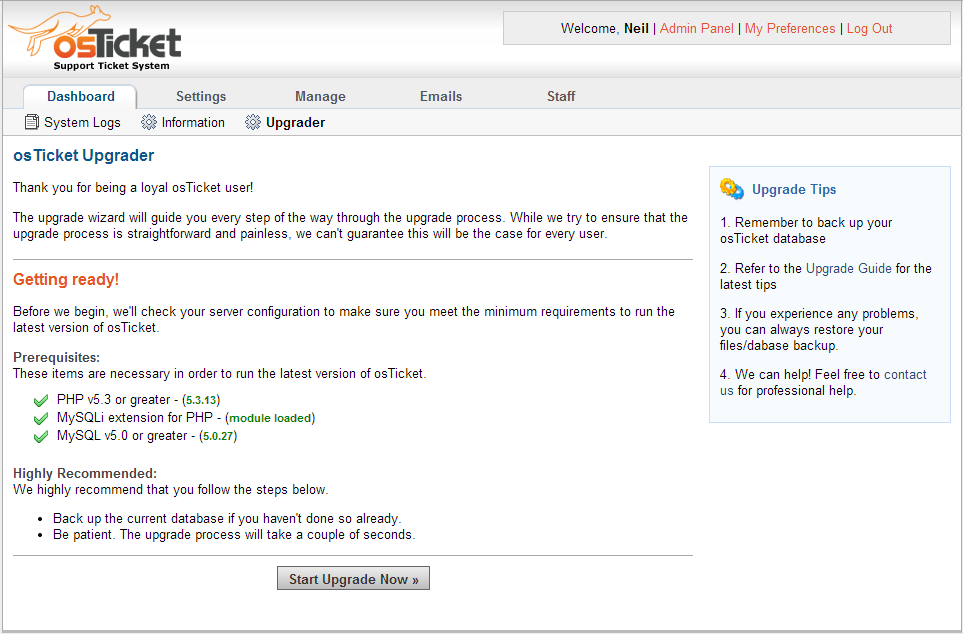
click image to enlarge
You should at this point be able to click the “Start Upgrade Now” button. The next screen should look like this:
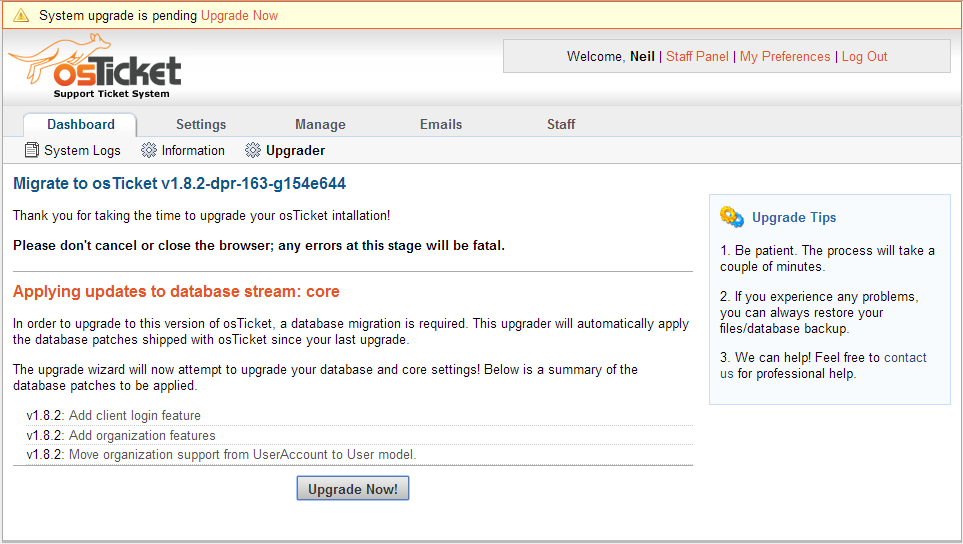
click image to enlarge
Unless you have a reason not to, go ahead and click the “Do It Now!” button. This should result in a small rectangle popping up in the middle of your screen like this:
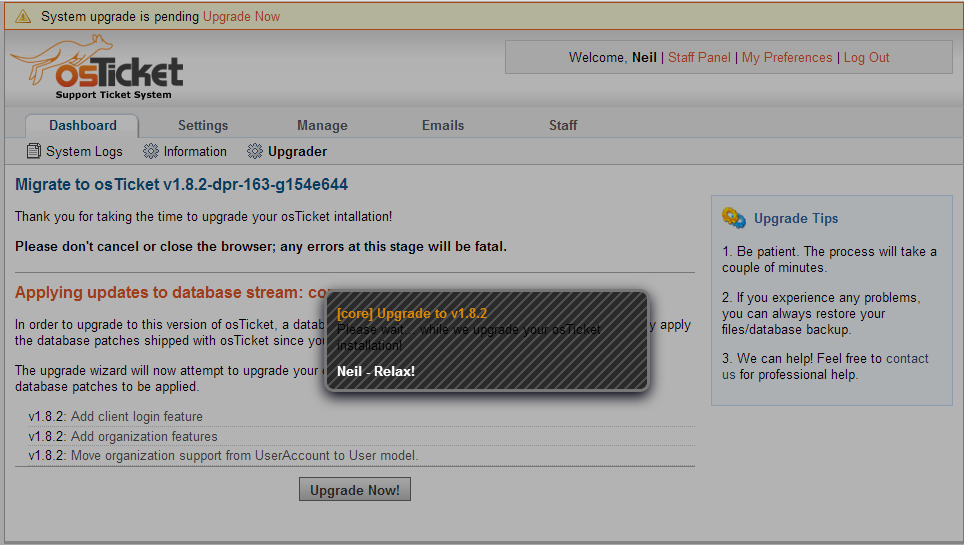
click image to enlarge
Once it has completed you should be looking at the following page:
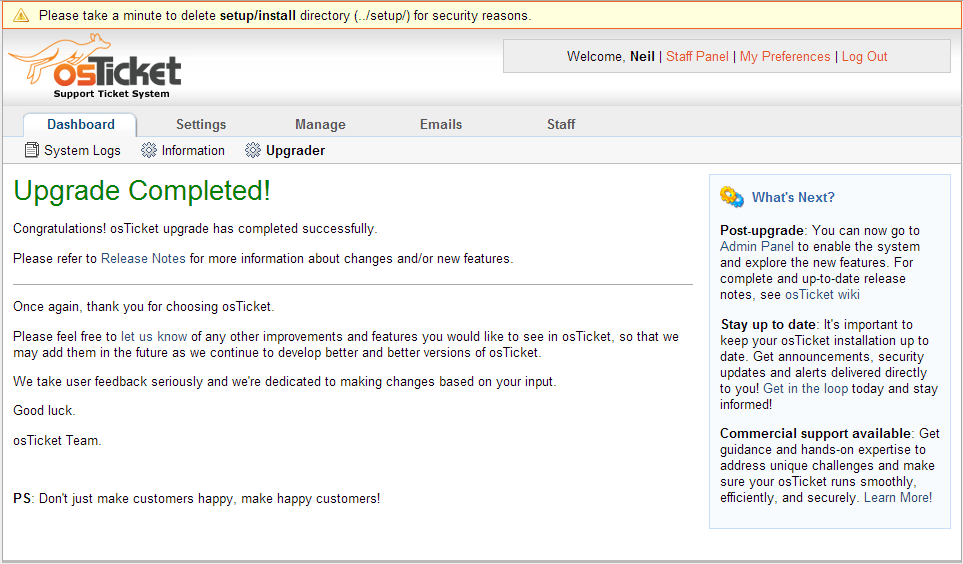
click image to enlarge
Now if you click on the Settings tab you should be looking at the following:
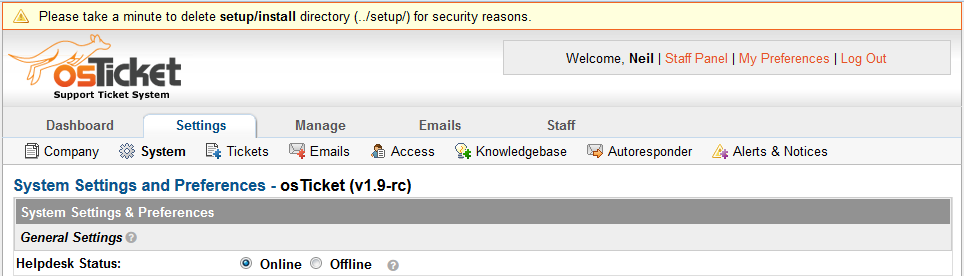
click image to enlarge
While you are here if you put the site into Offline mode you should put it back in Online mode (don’t forget to click Save Changes at the bottom of the page).
Congratulations! You’ve upgraded from 1.8.1.2 to 1.9, however you are not quite finished yet.
7. Time for post install clean up.
First go into your OSTicket directory and delete [or rename] the setup folder. It is not needed for a live or production site and should never be left on a publicly accessible server. I recommend that you delete it, but some people like renaming it to keep the files around should they need it again. For the record you should not need it again, and if you did you can always just re-download the distribution archive.
That’s it for the “hard” stuff. I would at this point recommend that you take another back up of your site (both database and files) since you just made major changes to the site.
As a side note, if you are upgrading from 1.8.2 (beta) to 1.9rc you will not see the upgrader because there were no database changes between those two versions.
Enjoy!
N
tmib
p.s. the instructions for installing and configuring the LDAP/AD plugin really haven’t changed.