
So you’re running osTicket version 1.10.x and you want to upgrade it to current which as of this writing is 1.11.0, and you need a little help. Well, you’ve come to the right place. One very important thing to note: contrary to what the osTicket FAQ at https://osticket.com/faq says, you need a newer version of PHP than 5.3. I would recommend any version from 5.6 to 7.2. So if you have 5.3 go upgrade first. This version introduces support for 5.6 to 7.2. As of this writing I am running 7.2.15 in production on multiple sites.
If you have ever upgraded osTicket in the past your experience this time will not be much different than it was previously.
Before you start it is important to mention that if you have installed any mods or performed any custom coding (including changing graphics, translations, etc.) that upgrading will not be as simple as it sounds in this article and you will lose all the modifications that you have made. You could very well break your site or at the very least lose some of the functionality that you currently enjoy.
1. Put the site into offline mode.
To do this log into your site and navigate to Admin panel -> Settings -> Helpdesk Status and toggle the radial to “Offline (Disabled)”, scroll down and click “Save Changes”.
note: I personally leave the site open, but navigated back to the Client panel.
2. Make a backup of your database.
There are various ways to do this and I am not going to cover all of them. My preferred way is to use command line. You can do this by simply issuing a command similar to:
mysqldump -u userName -p databaseName > fileName.sql
note: change userName to your DB username, databaseName to the name of your DB, and fileName to what ever you want to call the backup file.
One other easy way to do backups (on windows) is to use MySQL Admin (deprecated) or MySQL WorkBench.
3. Make a backup of your site.
Once again there are various ways to achieve this. I trust that you know how you want to do it, just make sure that you do it.
NOTE: You should never rely on your ISPs automatic backups,
always make your own backups before upgrading!!!
While you are here, you may want to also make a separate copy of your /include/ost-config.php file. This file contains the database connection information.
4. Download the latest version of OSTicket. osticket.com/download.
Note: If you are running any plugins (especially any of the auth plugins), you should also download the new versions of those.
5. Extract it to your OSTicket directory. Yes, you can and should have it over write existing files.
Note: If you also downloaded upgrade to your plugins make sure that you put there in /include/plugins at this point.
6. re load your web page. When the page loads you should be looking at the image below. Since this is an upgrade you should be looking at the upgrader. This is important to note since the Upgrader looks different from the Installer.
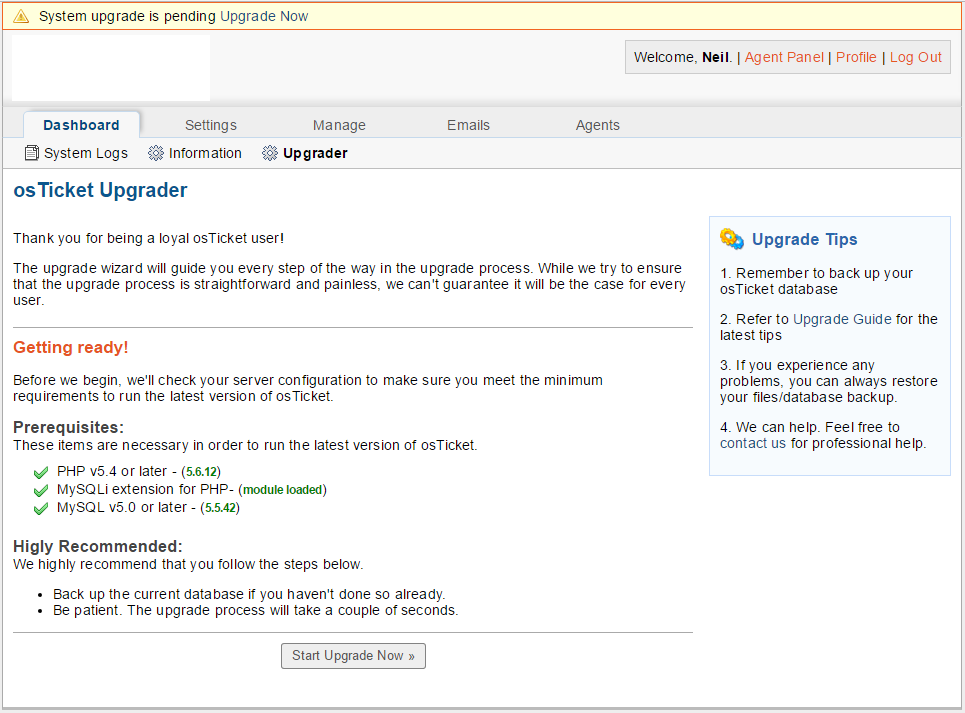
click image to enlarge
At this point you should be able to click the “Start Upgrade Now” button. The next screen should look like this:
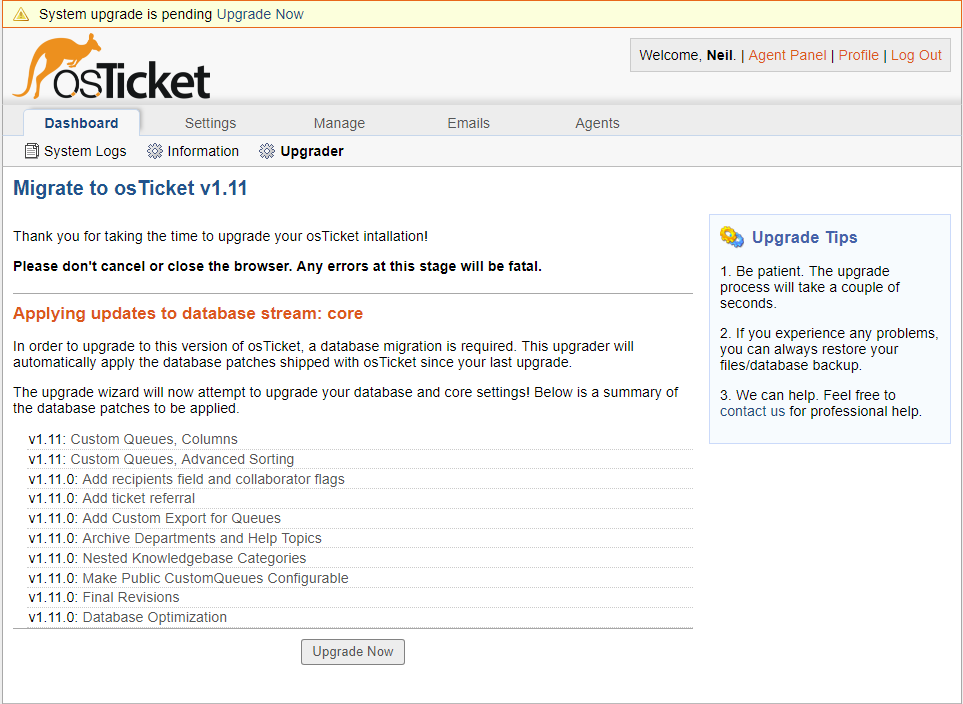
click image to enlarge
Unless you have a reason not to, go ahead and click the “Do It Now!” button. This should result in a small rectangle popping up in the middle of your screen like this:

Once it has completed you should be looking at the following page:
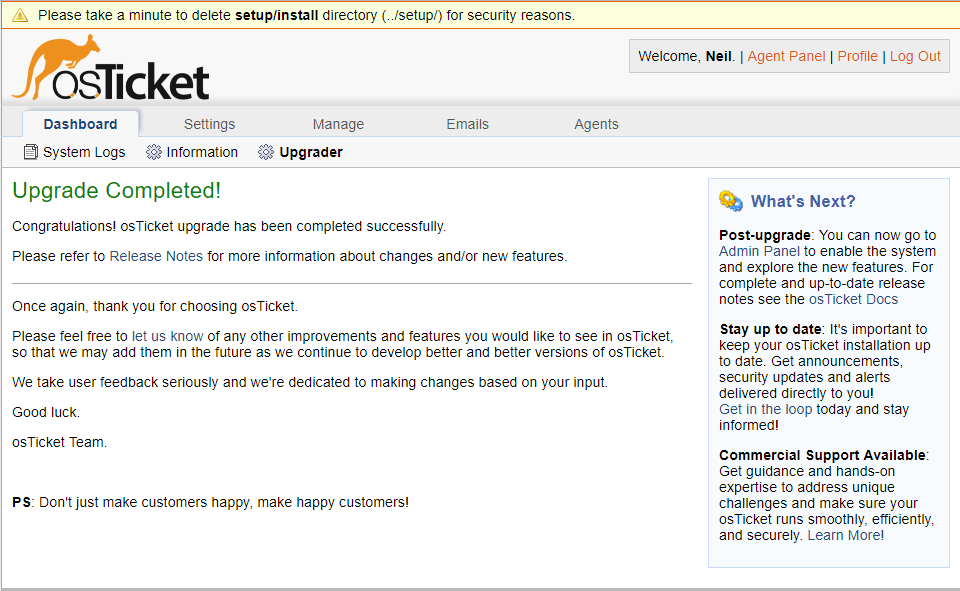
click image to enlarge
Now, if you click on the Settings tab you should be looking at the following:
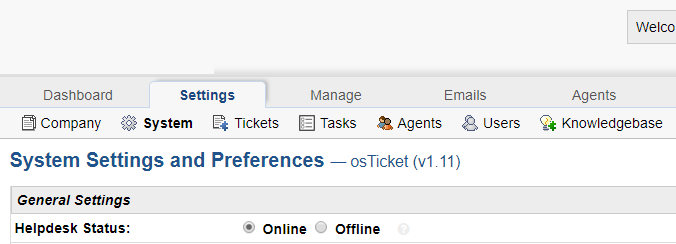
click image to enlarge
While you are here, if you had previously put the site into Offline mode, you should put it back in Online mode (don’t forget to click Save Changes at the bottom of the page).
Congratulations! You’ve upgraded from 1.10.x to 1.11.0, however you are not quite finished yet.
7. Time for post install clean up.
Go into your OSTicket directory and delete [or rename] the setup folder. It is not needed for a live or production site and should never be left on a publicly accessible server. I recommend that you delete it, but some people like renaming it to keep the files around should they need it again. For the record you should not need it again, and if you did you can always just re-download the distribution archive. This will also get rid of the annoying nag screen at the top of the site.
Next go to your /include folder and make the ost-config.php read only. How to do this varies by OS.
That’s it for the “hard” stuff. I recommend that you take another backup of your site (both database and files) since you just made major changes to the site.
Enjoy!
ntozier / tmib
p.s. the instructions for installing and configuring the LDAP/AD plugin really haven’t changed.