
This article was updated on 18 Apr 2013
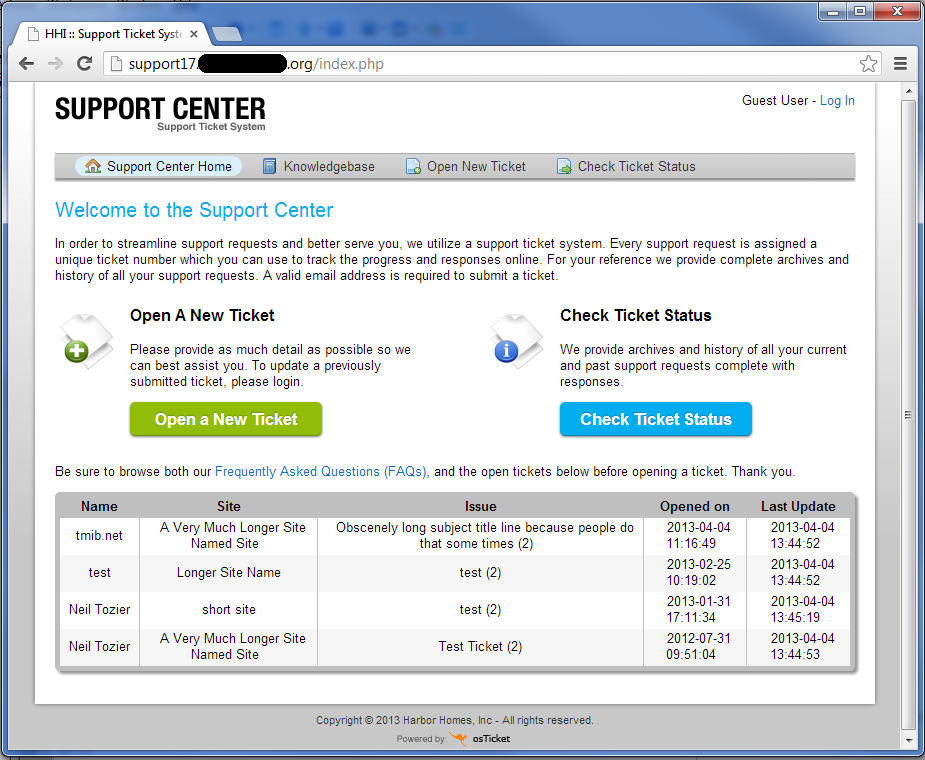
One of the features that I would love to see integrated into osTicket is an open ticket listing for clients. I feel that it gives clients the ability to see what tickets are already open so as to cut down on duplicate tickets, and give them a better idea of how many tickets are ahead of them when they place their request. Now that osTicket 1.7ST has been released I have updated my previous mod for osTicket 1.6ST and re-released here for everyone to be able to use. I have included two ways to install it. If you have modified your installation already you can install manually following the directions. If you have not modified your installation I have included all the files that you can simply copy over your existing ones.
1. Save the display_open_topics.php into your base osTicket folder.
Open it and edit the lines 17 through 20 to match your setup.
Note: my installation uses an additional field ‘agency’ (site) and this is setup to display that field. You will need to change this to remove references to it.
2. Save the theme.css to osticketDirectory\assets\default\css\theme.css
-OR-
open osticketDirectory\assets\default\css\theme.css
A. To make the landing page fit together a little better
scroll or find:
#landing_page #new_ticket
change
margin-top: 40px;
to
margin-top: 10px;
scroll or find:
#landing_page #check_status
change
margin-top: 40px;
to
margin-top: 10px;
Note: I submitted this minor change to core on 04/04/2013 so it may not be needed in the future.
B. add the following to the bottom
#openticks {
  padding:5px;
  background:#BFBFBF;
  -moz-border-radius: 5px;
  border-radius: 5px;
  -moz-box-shadow: 3px 3px 3px rgba(0, 0, 0, 0.4);
  -webkit-box-shadow: 3px 3px rgba(0, 0, 0, 0.4);
  box-shadow: 3px 3px 3px rgba(0, 0, 0, 0.4);
}

#openticks-a {
  border-right-style: solid;
  border-right-width: 1px;
  border-right-color: #BFBFBF;
  text-align:center;
  vertical-align:middle;
  padding-bottom:4px;
}

#openticks-b {
  text-align:center;
  vertical-align:middle;
  padding-bottom:4px;
}
3. Copy the index.php (included) into your base osTicket folder
-OR-
open and edit \index.php
scroll down and replace line 50-54
<p>Be sure to browse our <a href="kb/index.php">Frequently Asked Questions (FAQs)</a>, before opening a ticket.</p>
</div>
<?php
} ?>
<?php require(CLIENTINC_DIR.'footer.inc.php'); ?>
change to:
<p>Be sure to browse both our <a href="kb/index.php">Frequently Asked Questions (FAQs)</a>, and the open tickets below before opening a ticket.  Thank you.
  <div id="openticks"><?php include('display_open_topics.php'); ?></div>
</p>
</div>
<?php
} ?>
<?php require(CLIENTINC_DIR.'footer.inc.php'); ?>
NOTE: This will not get displayed if you have not enabled and setup knowledgebases and have a public FAQ! To do so read this article: setting up and using FAQS in osticket. Alternatively you can replace the code change above with this one:
<?php
if($cfg && $cfg->isKnowledgebaseEnabled()){
    //FIXME: provide ability to feature or select random FAQs ??
?>
<p>Be sure to browse both our <a href="kb/index.php">Frequently Asked Questions (FAQs)</a>.
<?php
} ?>
<p>Please review the open tickets below before opening a ticket.  Thank you.
<div id="openticks"><?php include('display_open_topics.php'); ?></div>
</p>
</div>
<?php require(CLIENTINC_DIR.'footer.inc.php'); ?>
The file archive for this mod can be downloaded here.